
How to Change Brake Pads: A Comprehensive Guide
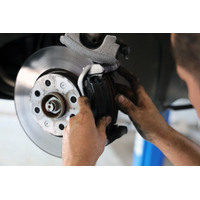

How to Change Brake Pads
Changing your brake pads is a common maintenance job, but it is also an important safety-related repair. If you have the right tools and are comfortable working on your vehicle, replacing brake pads can be completed at home.
This guide covers the basic process of replacing disc brake pads, along with some important checks to make before and after the job.
Before You Start
Before starting any brake work, make sure the vehicle is parked on a flat, stable surface and can be safely raised and supported. Never work underneath a vehicle that is supported only by a jack.
Brake components can become extremely hot during normal driving. Allow the brakes to cool completely before starting work.
Tools and Materials
- Floor jack
- Jack stands
- Wheel chocks
- Wheel lock key, if required
- Breaker bar or impact wrench for wheel nuts/bolts
- Socket set for caliper and slide pin removal
- Torque wrench
- Brake cleaner and clean rags
- C-clamp or suitable caliper piston tool
- Brake grease suitable for the components being lubricated
Step-by-Step Guide to Changing Brake Pads
1. Lift the Vehicle
Park the vehicle on a flat surface, engage the parking brake where appropriate and chock the wheels that will remain on the ground.
Use the manufacturer's recommended jacking points to raise the vehicle, then support it securely on jack stands before removing the wheel.
Pro Tip: Never work on a vehicle that is supported only by a jack. The jack stands should carry the vehicle's weight while you are working on it.
2. Remove the Wheel
Remove the wheel nuts or bolts and take the wheel off the vehicle. If the vehicle uses locking wheel nuts, you will need the appropriate key.
3. Remove the Brake Caliper
There are several different caliper designs, and the exact removal procedure varies between vehicles. Floating calipers are common on many vehicles, while fixed calipers are also used, particularly on performance and higher-specification applications.
Floating Calipers
- Remove the two slide pin bolts, where applicable.
- Slide the caliper away from the brake pads.
- Secure the caliper so it is not hanging from the brake hose. An occy strap or suitable cable tie can be used to support it from the suspension.
Pro Tip: If the caliper does not slide off easily, the piston may be pressing against the brake pad. You may need to push the piston back slightly using a suitable tool or the old brake pad before removing the caliper.
Fixed Calipers
Fixed calipers, such as those used by Brembo and AP Racing, can have different pad retaining arrangements depending on the application.
- Remove the retaining pins, springs or clips holding the pads in place. Take note of their orientation for reassembly.
- Remove the brake pads.
- If the caliper itself needs to be removed, unbolt it from its mounting position and secure it safely without putting strain on the brake hose.
4. Remove the Old Brake Pads
Once the caliper has been moved out of the way, remove the old brake pads. Take note of their position and any wear indicator or retaining hardware so the new pads can be installed correctly.
This is also a good opportunity to inspect the brake hardware, caliper and brake rotor for obvious signs of damage or excessive wear.
5. Check the New Brake Pads
Before installing the new pads, compare them with the old pads to confirm they are the correct shape and size for the application.
If the pads do not match the old ones, stop and confirm the correct part number before continuing. Some vehicles have multiple brake configurations for the same model and year.
If you are unsure which brake pads you need, the team at Empowered Auto Parts can help identify the correct product for your vehicle.
6. Retract the Caliper Piston
Before the new pads can be installed, the caliper piston may need to be pushed back to allow for the increased thickness of the new pads.
Use a suitable C-clamp or caliper piston tool and retract the piston slowly and evenly. Take care not to damage the piston, dust boot or caliper.
Some rear brake systems use a mechanical or electronic parking brake mechanism that requires a specific procedure or wind-back tool. Always follow the vehicle manufacturer's procedure for these systems.
7. Apply Brake Grease Where Required
Apply a small amount of suitable brake grease to the appropriate metal-to-metal contact points, such as the pad ears or contact points where specified by the brake design.
Caliper slide pins should only be lubricated where required, using grease that is compatible with the particular slide pin, seals and rubber components. Some brake systems use specific lubricants or require the slide pins to remain dry.
Important: Never apply grease or lubricant to the friction surfaces of the brake pads or discs.
Contamination of the friction surfaces can significantly reduce braking performance.
For more information about preventing brake noise, see our 3 Golden Rules to Eliminating Brake Noise.
8. Install the New Brake Pads
Install the new pads in the correct position, making sure they are seated properly in the caliper and any retaining hardware is correctly installed.
Check that the pads can move correctly within the caliper and hardware without binding.
9. Reinstall the Brake Caliper
Once the new pads are installed, reinstall the brake caliper and tighten the mounting and slide pin hardware to the manufacturer's specified torque.
Do not guess torque specifications for brake components. Refer to the vehicle manufacturer's repair information for the correct settings.
10. Reinstall the Wheel
Refit the wheel and tighten the wheel nuts or bolts in the manufacturer's recommended sequence. Once the vehicle is back on the ground, torque the wheel nuts or bolts to the manufacturer's specified setting.
After Installing New Brake Pads
Check Your Work
Before driving the vehicle, check that everything has been correctly reassembled and that there are no loose components.
With the vehicle stationary, pump the brake pedal several times until it becomes firm. This allows the caliper pistons to move back into position and the pads to contact the discs.
Do not drive the vehicle until you have a firm brake pedal.
Once you have confirmed the pedal is firm and everything has been reassembled correctly, carry out a careful test drive in a safe area. Check that the brakes operate normally before returning to normal driving.
Inspecting Brake Rotors
Replacing brake pads is also a good time to inspect the condition of the brake rotors. Brake pads and rotors work together, so fitting new pads to severely worn or damaged rotors can affect braking performance and pad life.
Every brake rotor has a minimum thickness specification set by the vehicle or component manufacturer. Measure the rotor using suitable measuring equipment and compare the measurement with the specified minimum thickness.
Other signs that a rotor may require replacement include:
- Excessive scoring or damage to the friction surface
- Cracks or other visible damage
- Severe corrosion or missing material
- Excessive thickness variation
- Rotor thickness below the manufacturer's minimum specification
Brake shudder can have several causes and does not automatically mean the rotors need replacing. The braking system should be properly inspected to determine the cause.
Learn more about brake shudder: What Causes Brake Shudder and Wheel Shaking?
Frequently Asked Questions
Can I change brake pads myself?
Changing brake pads is a job that many experienced DIY mechanics can complete themselves. However, it requires suitable tools, mechanical knowledge and a safe working environment. If you are unsure about any part of the process, have the vehicle inspected by a qualified mechanic.
Can I replace brake pads without replacing the rotors?
Yes. Brake rotors do not necessarily need to be replaced every time brake pads are changed. However, the rotors should be inspected and measured to ensure they are within the manufacturer's specifications and in suitable condition for use with the new pads.
What happens if you don't grease brake pads?
Brake grease is not required on the friction surface of the brake pad. Where lubrication is specified, the correct lubricant can be applied sparingly to the appropriate contact points. Using too much grease, or applying it to the wrong areas, can cause problems and contaminate the friction surfaces.
Should brake pads touch the rotor?
Brake pads sit very close to the rotor and may have light contact with it while the wheel is rotating. They are not designed to have a large visible gap between the pad and rotor. The pads should not be continuously dragging heavily against the rotor when the brakes are released.
How long do brake pads last?
Brake pad life varies considerably depending on the vehicle, brake system, driving conditions, traffic, vehicle load and driving style. There is no reliable universal kilometre interval for replacing brake pads. They should be inspected regularly and replaced when the friction material reaches the manufacturer's recommended limit or when the pads are otherwise damaged.
How long do brake rotors last?
Brake rotor life also varies depending on the vehicle and how it is driven. Rather than replacing rotors at a fixed kilometre interval, their condition and measured thickness should be checked against the manufacturer's specifications.
Conclusion
Replacing brake pads is a relatively straightforward maintenance job for someone with the appropriate tools and experience, but it is important to take the time to do the job correctly.
Use the correct parts for your vehicle, support the vehicle safely, follow the manufacturer's torque specifications and always confirm you have a firm brake pedal before driving.
If you're unsure which brake pads are correct for your vehicle, contact Empowered Auto Parts and we can help you find the right parts for your application.